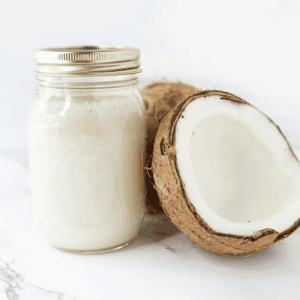
Homemade Coconut Milk
Jul 21, 2025

This post may contain affiliate links. Please read our disclosure policy.
Did you know that you can make homemade coconut milk with 3 simple ingredients and about 15 minutes?!
There are endless options in the dairy aisle, and it can all be a bit overwhelming. Plus, many people are looking for a healthier, more natural alternative to store-bought milk. Look no further!
Making homemade coconut milk is surprisingly simple, incredibly rewarding, and tastes far better than anything you can buy. Ditch the additives and preservatives, and get ready to unlock a world of creamy, delicious possibilities right in your own kitchen.
Below, we will walk you through everything you need to know to whip up your very own batch of fresh coconut milk, perfect for everything from curries to smoothies and beyond.
Related: How To Make Homemade Almond Milk
How To Shred Coconut

Ok, we know the first step is opening the coconut. So, don’t worry, we have a blog with two methods on how to open a coconut. Once you have that mastered, shredding it will be easy!
First, remove the white coconut flesh from the skin. Bigger pieces are easier to grate when you are using a box grater, so try to remove large pieces.
Next, hold the grater by the top handle. As you grate, use your arm to keep the grater pressed tightly against the cutting board or table.
Finally, hold the coconut against the holes of the grater and move it back and forth or up and down depending on the grater.
Homemade Coconut Milk Ingredients

- 1 coconut, 3 cups shredded
- 4-5 cups room temperature water
- 1 date, optional
Directions On How To Make Homemade Coconut Milk

First, add the shredded coconut and 3 cups of room temperature water to a high-speed blender. Then, blend on high for 2-3 minutes or until the mixture is creamy and well-combined.

Next, place a cheesecloth (or nut milk bag) over a fine-mesh strainer on top of a bowl. Then, pour the blended mixture through the strainer to separate the coconut pulp from the milk. Finally, squeeze or press out as much liquid as possible.

If you want some sweetness to your homemade coconut milk, you can add a date, agave syrup, vanilla extract or another sweetener.
Add a date to the strained milk. Add back into the blender, and blend briefly to incorporate. Adjust sweetness to taste. You can skip this step if you are not wanting to add any sweetness.

Finally, transfer the coconut milk to an airtight container or jar.
How To Store Homemade Coconut Milk

Homemade coconut milk should be stored properly to maximize its freshness. The best method for keeping it fresh is to pour the coconut milk into an airtight container, and refrigerate it immediately. This will keep the milk fresh for up to 5-7 days.
It’s common for homemade coconut milk to separate into a creamy layer and a watery layer when chilled. Simply stir or whisk it to recombine before use.
For longer storage, freezing is an option. You can freeze coconut milk in ice cube trays for convenient, pre-portioned amounts, then transfer the frozen cubes to a freezer-safe bag or container. Frozen coconut milk can last for several months. The texture might become slightly grainy upon thawing, which can be fixed by blending or whisking. Avoid refreezing thawed coconut milk.

Ways to Use Homemade Coconut Milk
Homemade coconut milk is incredibly versatile and can be used in a wide variety of dishes, both sweet and savory. Here are some popular ways to incorporate it into your cooking:
Savory Applications:
- Curries and Stews: This is perhaps the most classic use. Coconut milk adds a rich, creamy base and subtle sweetness that beautifully balances the spices of curries and stews.
- Soups: Use it to create creamy and flavorful soups. It can replace heavy cream for a dairy-free option.
- Rice: Cook your rice with coconut milk instead of water for a fragrant and slightly sweet side dish.
Sweet Applications:
- Smoothies: A fantastic dairy-free base for smoothies, adding richness and a tropical twist.
- Desserts:
- Puddings: Create creamy puddings like rice pudding or chia pudding.
- Ice Cream and Popsicles: Ideal for making dairy-free ice cream, “nice cream” (made with frozen bananas), and refreshing popsicles.
- Baked Goods: Substitute regular milk in recipes for cakes, cupcakes, muffins, or quick breads to add moisture and a hint of coconut flavor.
- Beverages:
- Lattes and Coffee: Use it as a dairy-free creamer in your coffee or to make a delicious golden milk latte.
- Cocktails: A key ingredient in tropical drinks like piña coladas.
Other Creative Uses:
- Breakfast: Pour it over cereal, oatmeal, or use it in overnight oats.
- Dressings: Incorporate it into salad dressings for a unique flavor profile.
Hommade Coconut Milk
Equipment
- Blender
- Cheesecloth nut milk bag
Ingredients
- 1 Coconut 3 cups shredded
- 4-5 cups Water room temperature
- 1 Date
Instructions
- Add 3 cups of shredded coonut and 3 cups of room temperature water to a high-speed blender. Blend on high for 2-3 minutes or until creamy and well combined.
- Place a cheesecloth (or nut milk bag) over a fine-mresh strainer on topf of a bowl. Pour the mixture through the strainer to separate the coconut pulp from the milk. Squeeze or press out as much liquid as possible.
- Add a date to the strained milk. Add back into the blender and blend briefly to incorporate.
- Transfer the coconut milk to an airtight container.
Notes
Nutrition
Nutrition information is automatically calculated, so should only be used as an approximation.